Repacking In Portal
Repacking Into One SKU
Use this process when breaking down a large pack size (24, 30, 36, etc.) into a single smaller format (for example, creating your own 6-packs or 8-packs).
Steps
- From the main screen, open Product Maintenance.
- Ensure that Units per Pack are set correctly for both the large pack and the smaller pack product.
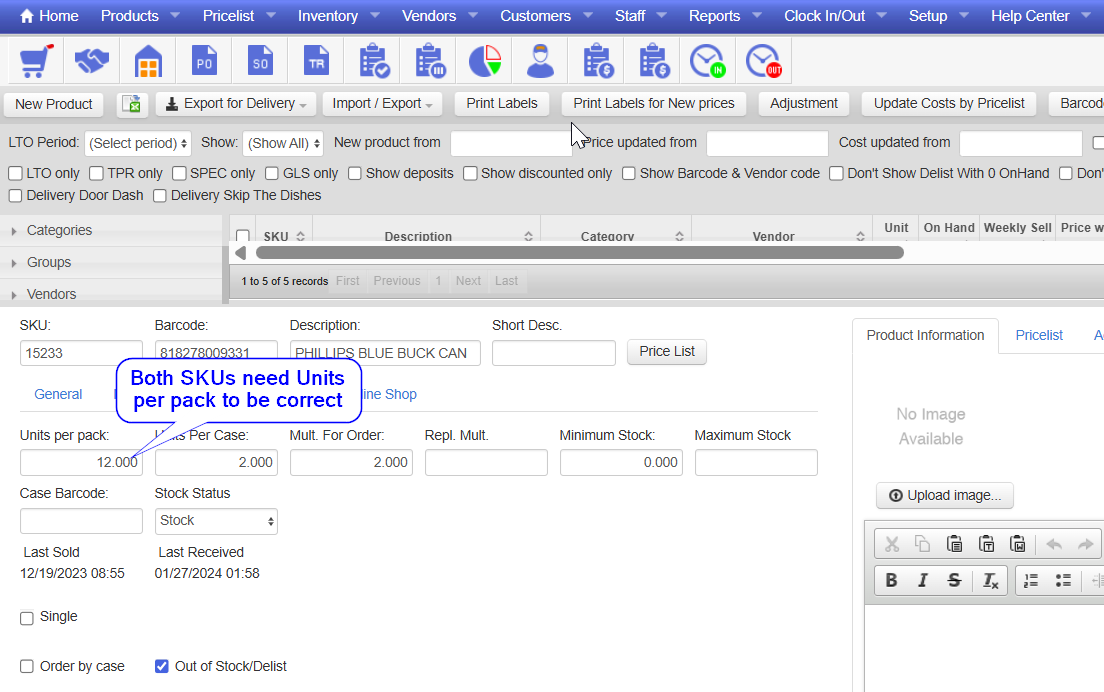
- Select the product you are repacking from (the larger pack).
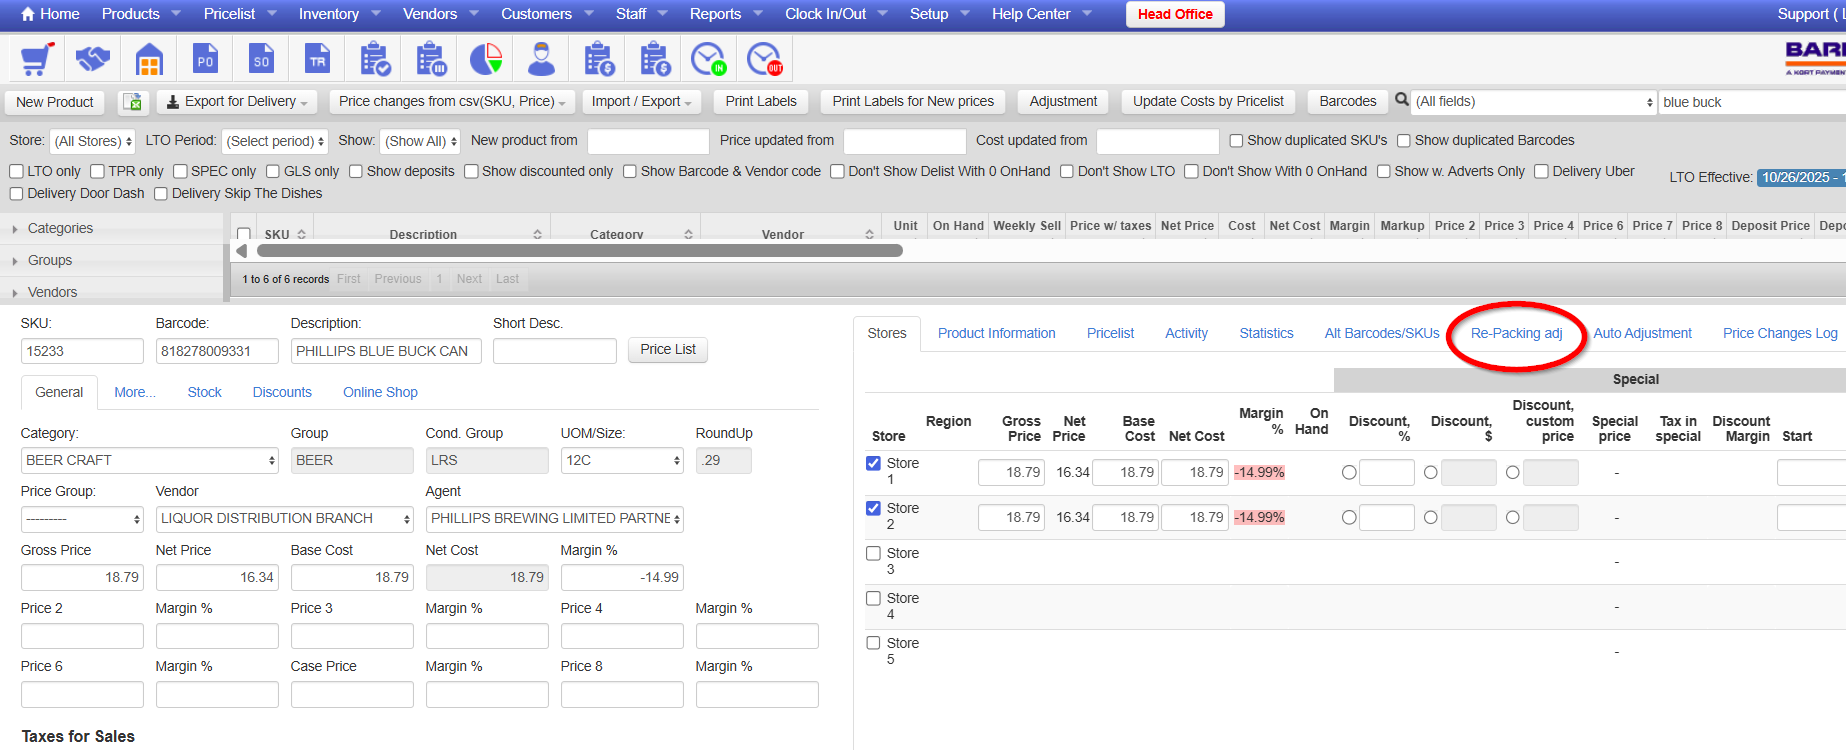
- Go to the Re-Packing Adj tab.
- Select the SKU for the item you are repacking into (the smaller pack).
- Set the quantity to repack (how many of the large packs you are breaking down).
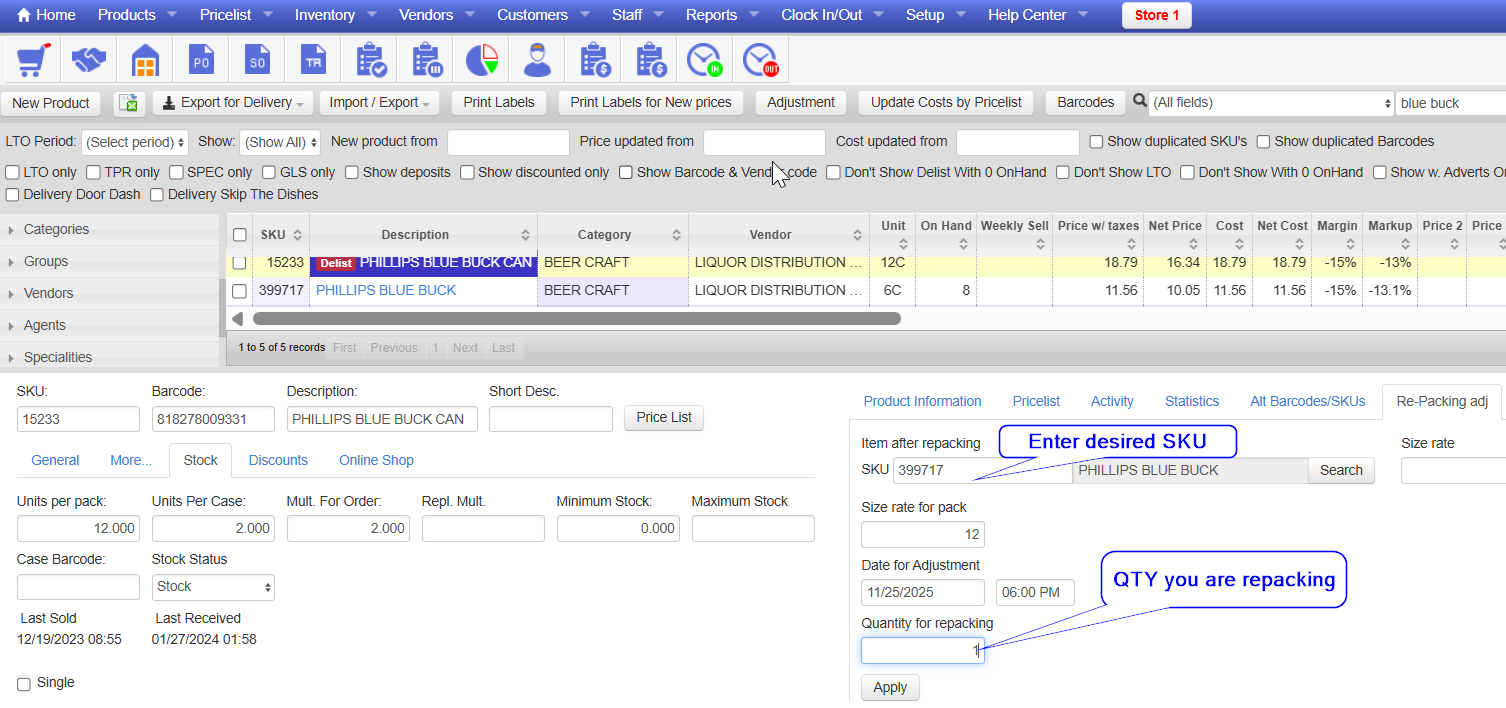
- Click Apply.
Results
- The repack will appear in both items’ Activity.
- A Repacking Invoice will be created under Receiving Invoices.
- If Units per Pack are set correctly, this invoice will automatically balance to $0.00.
- You can also repack up from singles into 6-packs, 12-packs, etc.
Repacking Into Multiple SKUs
Use this method when breaking one large pack into different smaller sizes at the same time. A standard repack will only push inventory into one SKU, so you’ll need to use an Adjustment Invoice.
Examples
- Repack 1 × 30-pack into 3 × 8-packs and 1 × 6-pack
- Repack 1 × 24-pack into 3 × 6-packs and 6 single cans
Steps
- In Receiving Invoices, create a new Adjustment Invoice.
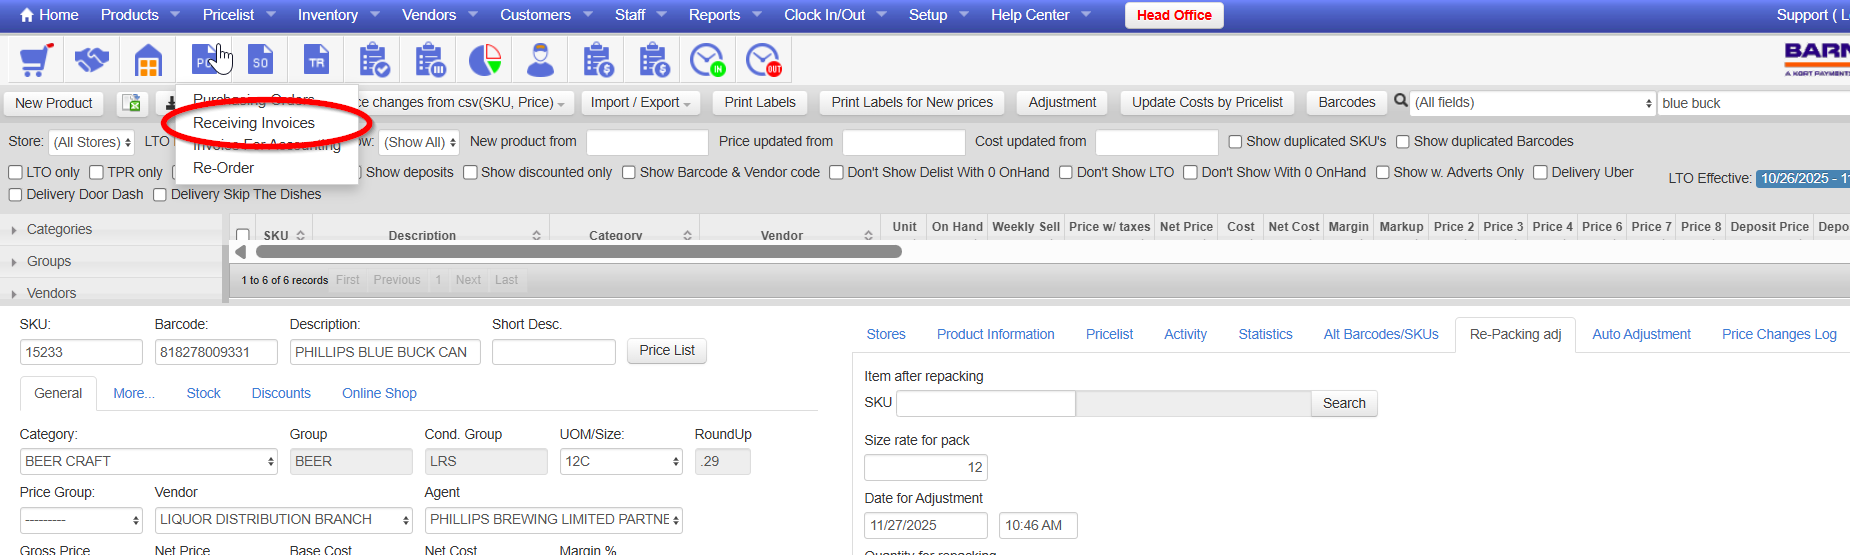
2, Select Repacking as the vendor.
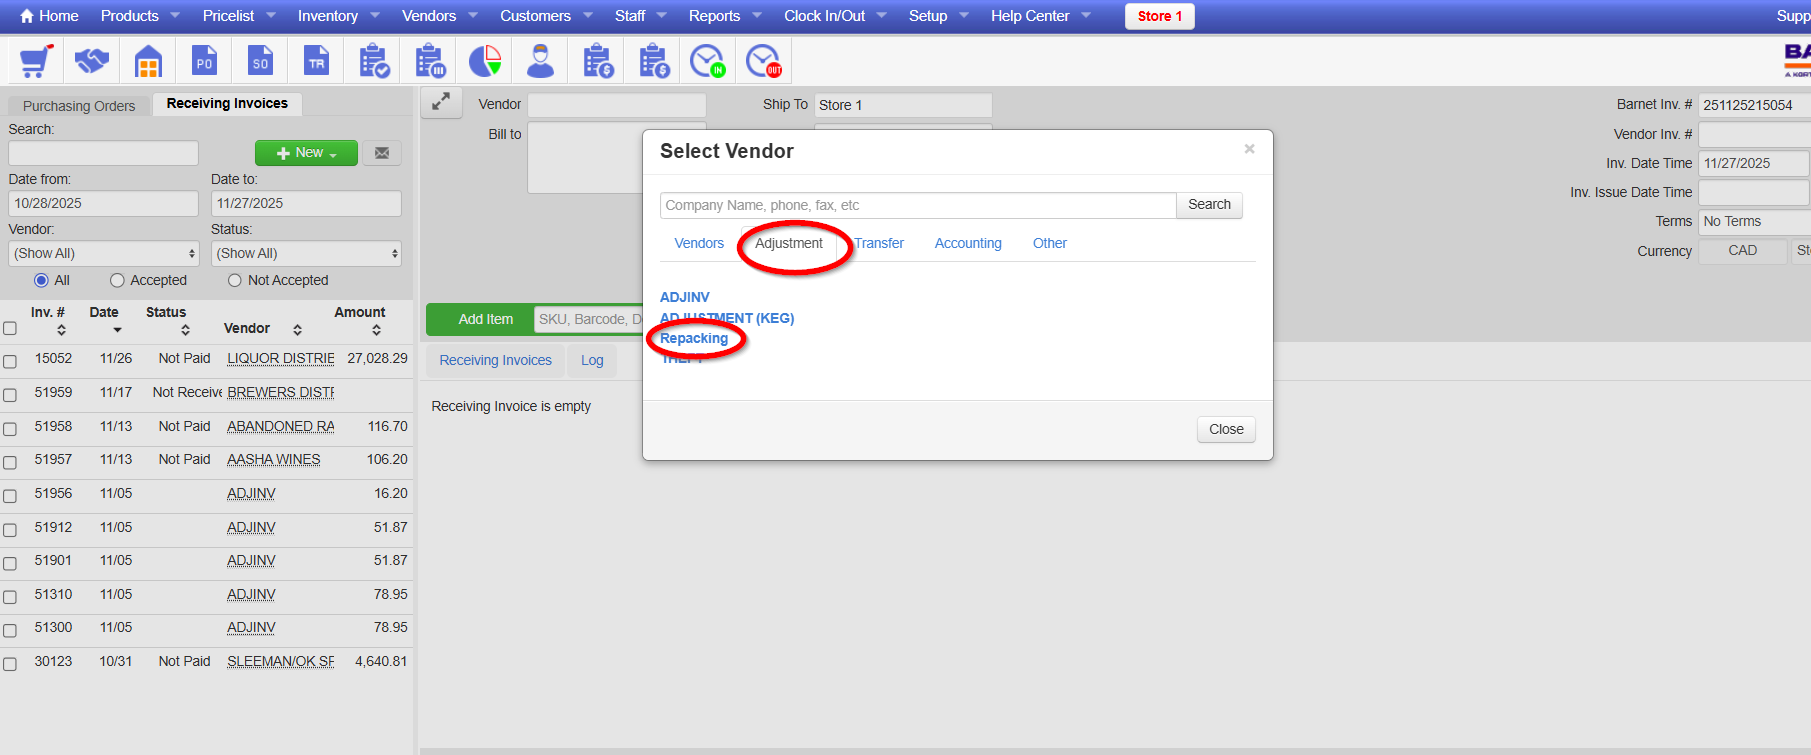
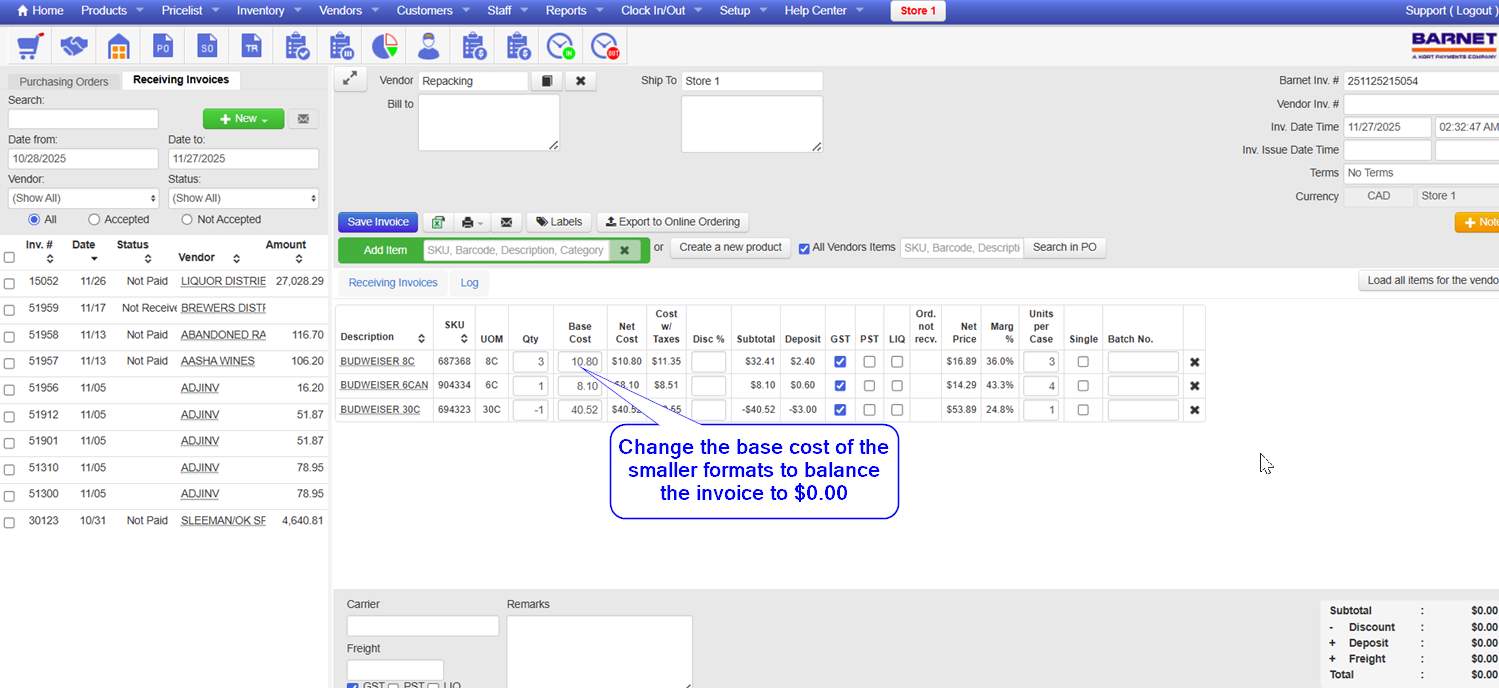
- Add the item you are repacking from with a negative quantity.
- Add all items you are repacking into with their correct quantities.
- Adjust the base cost of the items you are repacking into so the invoice totals $0.00.
Important Notes
- You can add multiple SKUs to the same adjustment.
- A properly completed repacking adjustment should always balance to $0.00.